Certain products have an option to add a foil blocked area to your design. You indicate this by using a special finishing swatch. This swatch is available in our templates, please ask for a copy before starting your design.
How to supply us your areas to be foiled
All of our InDesign templates include specific colour swatches for all finishing options or use the instructions below to set up the OPULEAF-GOLD, OPULEAF-SILVER and OPULEAF-COPPER spot colours yourself:
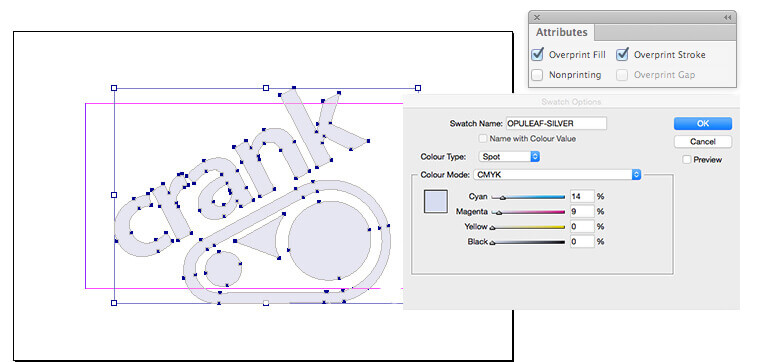
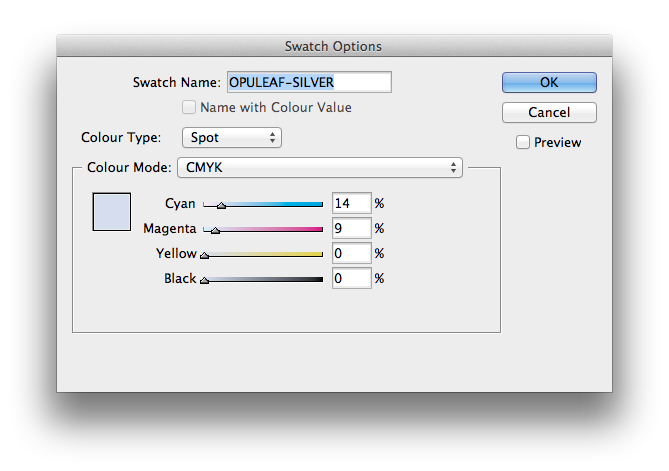
Creating the OPULEAF-SILVER swatch in InDesign/Illustrator
- Create a New Colour Swatch in InDesign.
- Name the swatch 'OPULEAF-SILVER' for silver (must be exact)
- Set Colour Type to Spot
- Set Colour Mode to CMYK
- Colour Make-up is 14% Cyan & 9% Magenta
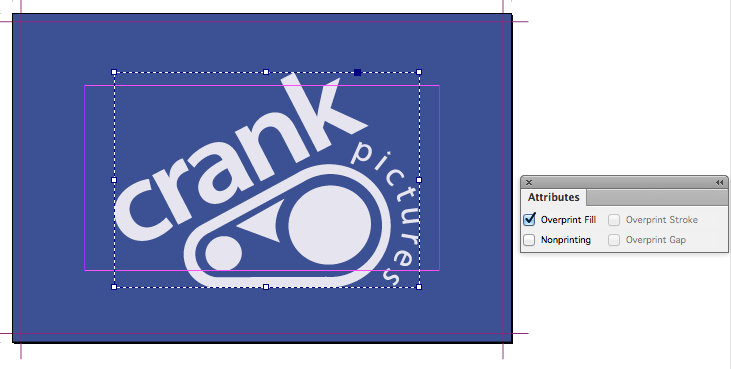
- Set swatch to Overprint ()

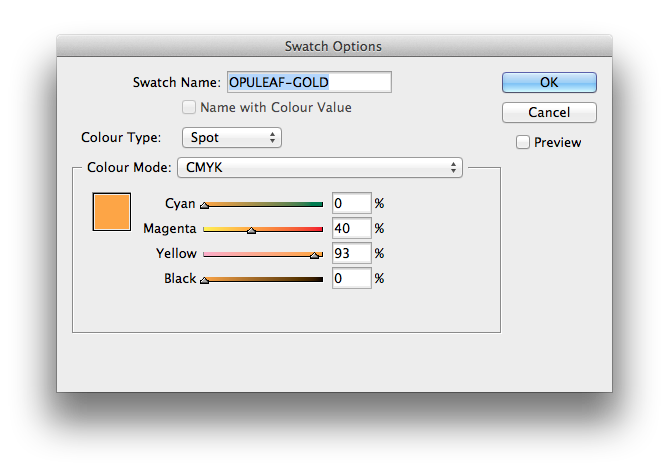
Creating the OPULEAF-GOLD swatch in InDesign/Illustrator
- Create a New Colour Swatch in InDesign.
- Name the swatch 'OPULEAF-GOLD' for gold (must be exact)
- Set Colour Type to Spot
- Set Colour Mode to CMYK
- Colour Make-up is 40% Magenta & 93% Yellow
- Set swatch to Overprint ()
Creating the OPULEAF-COPPER swatch in InDesign/Illustrator
- Create a New Colour Swatch in InDesign.
- Name the swatch 'OPULEAF-COPPER (Must be exact)
- Set Colour Type to Spot
- Set Colour Mode to CMYK
- Colour Make-up is 38% Magenta, 72% Yellow & 28% Black
- Set swatch to Overprint ()

How to add the Foil Blocking to your artwork
-
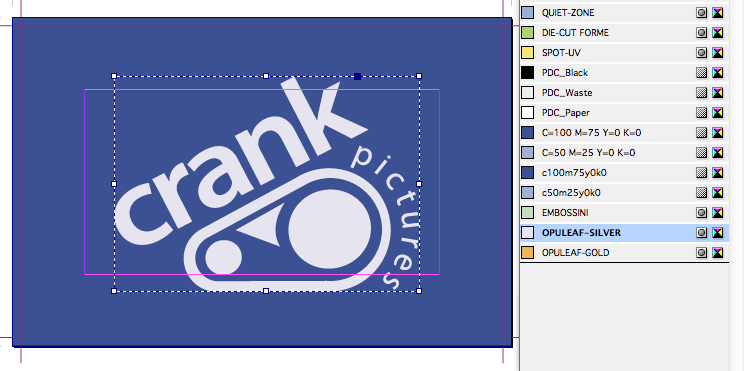
Place the Foil Blocking elements above your using one of the special Foil Blocking spot colour swatches.
There are 2 swatches available:
- OPULEAF-GOLD for gold foiling
- OPULEAF-SILVER for silver foiling
You can only use one or the other, not both
These swatches must remain as a spot colours and must not be adjusted in any way.
-
Set the OPULEAF-GOLD or OPULEAF-SILVER elements to Overprint from within your design application.
-
Avoid having areas of Foil Blocking bleeding to the edge as chipping and flaking of the foiled area may occur once the job has been guillotined.
-
Only add Foil Blocked elements on the front page of your artwork.
Limitations: Getting the most from Foil Blocking
Design with a little tolerance for mis-registration
Foil stamping or blocking is a process where a solid area of the paper has a silver or gold metallic foil applied by heat and pressure This means that the registration with print can vary by ±1 mm. This means you should expect the Foiled element to move around the page by up to ±1mm.
If you are aiming to cover a printed shape having a hard edge, then the Foiled area should overlap the printed edge by 1 mm to allow for any inherent variations in registration.
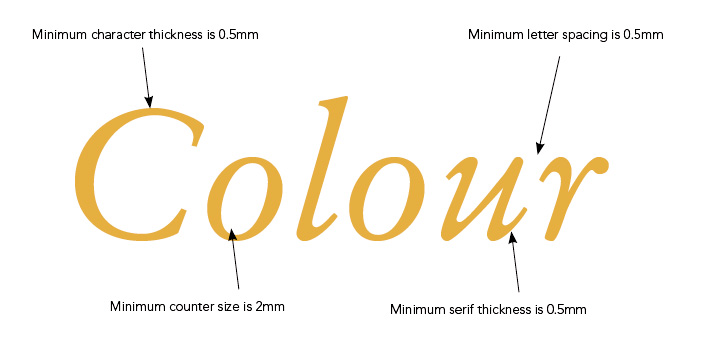
Don't try to align fine detail
Foiling is not suited to alignment with fine detail, such as small type, or shapes with thin lines.
Our rule of thumb:
- avoid positive lines thinner than 0.5mm, and
- avoid reversed-out lines thinner than 2 mm.
- 1mm minimum spacing between separate foiled elements.
You’ll get best results when you don’t try to match the Foiling to printed objects, and instead treat it as a design element in its own right. Seperate Foiled elements should have a minimum spacing of 1mm. Placing elements too close to each other will result in them becoming one shape and filling in.
Avoid using Foiling on small text. Fine fonts, particularly those with Serifs or tapered lines do not produce good results. The thinnest part of the font must be 1mm in width.
Avoid large Foiled areas over the page edge
Avoid having areas of Foiling bleeding to the edge as chipping and flaking of the Foiling area may occur once the job has been guillotined.
Vectors only for Foil Blocking
Foil Blocked elements must be supplied in vector format; any text shapes to be spot-varnished must be converted to paths/outlines.
Check the minimum thickness on text elements
Remember to:
- avoid positive lines thinner than 0.5 mm, and
- avoid reversed-out lines thinner than 2 mm.
That includes the counters, stroke width and serifs on fonts.
Solid Foiling only; no tints
Foiling cannot be specified as a gradient or tint, i.e. a changing tint from 100% to 0% over an area of artwork.
Foiling Imprint
The process of foiling leaves a faint cross hatch effect on the reverse of the product where foiling is applied on the front. Foil residue can also be present on the edges of foiled areas. This is inherent in the foiling process.
Samples
We have produced some printed samples that demonstrate how to use Foil blocking, ask us for your free copies.

 Print this page